Showing posts with label chocolate. Show all posts

Wednesday, 14 August 2013

'Yes! We have no bananas.' 'No, actually we have *literally* hundreds of bananas.'

Dear Readers,
As someone who actually *dislikes* bananas and would never dream of eating one raw (is it the phallic implication or just the texture or both?), I seem to find myself in the perplexing position of *always* having some bananas, and, what's more, they always seem to be on the cusp of liquidification. Literally. (The  dictionary-definition-minded reader will now be wondering which definition I mean of 'literally' here - see THIS ARTICLE for more information.) 

I have already brought you one 'what to do with over-ripe bananas' recipe, but in honesty it was a bit of a faff to make, so this is a far simpler option and, indeed, one I made this morning in no time at all! 

Ingredients: 175g plain flour
2 teaspoons baking powder
1/2 teaspoon bicarbonate of soda
125g unsalted butter melted
150g sugar (whatever you have in works - granulated is fine for this recipe) 
2 large free range eggs
However many ripe bananas you are trying to get rid of mashed up (normally 3/4 is the right amount)
Vanilla extract
100g / however much dark chocolate you have cut into small chips 
First things first: Line a loaf tin with greaseproof paper and melt the butter in a saucepan. One of the easiest things about this recipe is that it only involves stirring, so you don't have to worry about your butter being straight from the fridge or anything like that because you're melting it anyway. 
Pour the melted butter on top of the sugar and beat together. 
Then beat in the eggs one by one. The mixture will thicken slightly and look something like this: 
 Then add the mashed bananas, dash or two of vanilla extract and stir it all together.
Mix the flour, baking powder and bicarb together very thoroughly - WARNING: if you don't mix in the baking powder and bicarb properly you might end up with a soapy flavour towards the bottom of the cake which is never a good thing - and then stir into the bowl about a third at a time. Stir it in well. 
The mixture will be pale and fairly thick but still thoroughly pourable. It's a very different kind of mix to a sponge cake - this is more like a batter - so don't expect it to be anything other than pourable. 
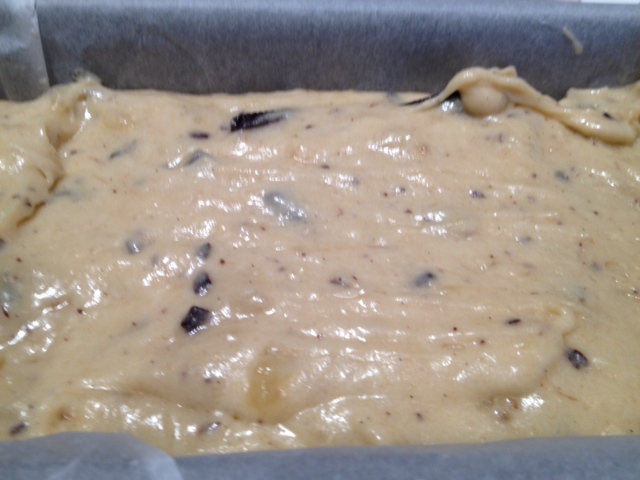
Stir your chocolate chips into the mix...
Et voila! Pour/scrape/splodge into the loaf tin and the cake is ready to go into the oven at 170 degrees for about an hour (fan assisted - prob an hour and a quarter conventional) - keep checking in the last 5/10 minutes by inserting a skewer. If it comes out clean the cake is ready.
I think you're supposed to leave it to cool before cutting it, but I prefer banana loaf hot from the oven and have convinced myself that it is a great breakfast substitute as it has fruit in it. (Ahem.)
I could never drink a glass of milk, but I had fun styling the cake for this photo with a little glass of milk for a pleasingly retro feel. 
Until the next time,
Silver Whimsy x

Friday, 9 August 2013

Day three of five... Adventures in Chocolate!

Dear Readers, 
How are you bearing up during The Marathon of Whimsy? Silver Whimsy herself is becoming slightly fatigued by all this baking, but is nonetheless ENJOYING the CHALLENGE! (Never a good sign when one talks of oneself in the third person is it?)

So today, the Whimsy Kitchens bring you what has been described by our Number One Baking Guru Dan Lepard as "simply the best chocolate muffin you'll ever eat". And, by George, I tell thee this needs be true because this is quite probably the most complex chocolate muffin you will ever make as well. I started baking at 11 am and I have only just finished, so from mise-en-place prep through to baking to icing to Whimsy photoshoot, these chocolate muffins have taken THREE HOURS to make. That is a long time in my book! 
First things first, here are the ingredients: 

50g cornflour
3 tablespoons cocoa
100g dark soft brown sugar
225 ml cold water 
75g unsalted butter (cubed) 
125g dark choc broken up into small pieces
75ml sunflower oil
2 teaspoons vanilla extract
2 large free range eggs
125g caster sugar
125g plain flour
2 1/2 teaspoons baking powder

So, these are entitled 'Chocolate custard muffins' and come from Dan Lepard's 'Short and Sweet' book. The name instantly put me off as did the complexity of the recipe. It has;t really been noted here but I have NO luck when it comes to baking with chocolate. It always seems to go wrong. SIBF suggests it's just that my palate doesn't really work around chocolate in baking and I think that's true, but I also think I just suck at baking with chocolate. I was hoping Dan's recipe would break that trend! 
The first step was super-exciting because it felt like SCIENCE! Place the cornflour, cocoa, brown sugar and water into a saucepan. Whisk under a medium heat constantly and watch the magic happen!!! As it reaches boiling point (don't be put off - it will take a few minutes), your mixture will begin to turn incredibly thick, smooth and shiny as pictured above. It is v exciting! When this happens, remove from the heat and...
...beat in the butter and chocolate until melted and absorbed (doesn't take very long at all). 
Then, beat in the oil, vanilla and one of the eggs until it's combined before...
...beating in the caster sugar and remaining egg until the mixture is smooth, glossy and thick. It will probably look a bit like this: 
Sift the flour and baking powder together into the pan and marvel as your hand too turns preternaturally enormous as mine in the picture below. (Sorry, I just had to include this image as I CANNOT BELIEVE how long my fingers look. I am also EXTREMELY AMUSED by the shape of my little finger.)
 Scoop out into your muffin tray. TOP TIP: I wasn't sure how deep I could fill them and ended up with some mixture left over but having made them I can now confirm that you can fill your cases to the top as they don't rise *that* much and mine could have definitely taken more mix.
 Bake in the oven at 160 fan assisted for twenty five minutes. They do give you a sense of pride when they come out of the oven because they promise so much! Especially for a baker renowned (by her SIBF) for chocolate baking disasters.
 I'm not even going to BEGIN explaining how I made the extremely extra-chocolatey-get-me-some-more-chocolate-oh-no-that-is-way-too-much-chocolate-help-I-have-now-o'd'd-on-green-and-blacks chocolate icing, but if you would like the recipe, feel free to email me or leave a message on the blog.
 I suggest serving in the garden with a cocktail umbrella. And possibly a cocktail.
 Anyone want a chocolate muffin? Seriously I have SO MUCH CAKE IN THE HOUSE HELP! COME AND EAT SOME!!
Until the next time, which I calculate to be tomorrow,
Silver Whimsy x


Wednesday, 20 February 2013

Life is one hell of a rocky road, so you may as well eat chocolate...

Q: What does a Hampstead Baker do when the oven is broken?
A: Experiment with the creation of Rocky Road. 

I have long been fascinated by the slabs of chocolatey biscuit treats you often see in the front counters of cafes country-wide. I think this fascination stems from a cafe I frequented during my university years (whose name I forget and extensive googling for which does not locate) which had the widest array of every type of biscuity-slab you might ever possibly find in their window. This being the case, I am surprised to find myself saying I have never until this day attempted to make any of these things. Possibly because they are ubiquitous and why should one attempt to make something so readily available, but probably because no baking is necessary and wherefore art one a Hampstead Baker if one is merely melting and refrigerating? This being said, my oven is broken and so I find myself in the melting and refrigerating stage of sweet-treat making and I must say it is an unexpectedly satisfying activity.
Be warned! Rocky Road is not a cheap creation and the more money you put into the chocolate you use, the better and more delicious your product will be...
 
You will need: 400g best quality dark chocolate (green and blacks is the best really, let's face it)
100 g mini marshmallows or full sized ones cut in quarters
200g rich tea biscuits 
3 tablespoons golden syrup
125g unsalted butter + about 20g more
Buying the ingredients for this recipe is fun as you look pretty much like either someone throwing a child's birthday party or a really useless contestant on Ready Steady Cook.
You do NOT need an oven, but you DO need a hob and a refrigerator.

Crush your rich tea biscuits using a rolling pin. It's good to have a mixture of decent sized bitey bits and some crumbs for textural purposes. 
Check out my silver nail polish, dear Readers. (These details are important.)
Melt 300g of the chocolate with 125g butter and the golden syrup. Melt it slowly over a v low heat. The saucepan I used was too small - would have been much less messy in a bigger pan as you do all your mixing in the same pan.  Simultaneously, melt the other 100g chocolate with the 20g extra of unsalted butter and leave to cool - this will be poured onto the top of the Rocky Road to smooth over the surface. Rather like laying the tarmac over the rough road. (Clearly, I have experience in the art of road surfacing.)

Fold the biscuits and then the marshmallows using a spatula into the original melted chocolate mix (the one with golden syrup). The mixture won't look beautiful but more like the rocky road surface after which it is named! 
Scoop the mixture into a foil lined brownie tray and smooth the surface as much as you can. 
Then pour the extra melted chocolate all over the top allowing it to fill in all the ruts and ridges of your ridiculously rocky road. Pop it in the fridge and leave it to chill over night. 
The following day, cut your creation into small squares (you may need to dip your knife in boiling water to help you cut through the dense chocolate) and drench in icing sugar. Serve with strong, hot tea to very hungry/sugar craving individuals. It is incredibly rich and gooey and not really for the faint hearted. 

  Having made my first Rocky Road I am slightly taken aback by what a long process it is to make something so apparently effortless and simple. There may not be very much skill in melting chocolate and stirring in some biscuits, but an element of patience is required (along with foresight) seeing as these have to be made a day in advance to be enjoyed - or at the very least in the morning to be eaten in the afternoon. Equally, for something that manages to cost about a pound in the shops, making these choclate-bars/biscuits/*things* is not an exactly economically viable day to day activity BUT there is something pleasing about having made it from scratch rather than merely consuming it. 
 Definitely a recipe to keep hold of and bring out on those occasions where you need to be reminded that however rocky the road might seem, there is always chocolate around the corner...
 Love and biscuits,
Silver Whimsy x

Thursday, 14 June 2012

Back to Baking... Chocolate Chip Cookies (featuring alliteration)

Dearest Readers, 
Well, as promised I am back and baking!

This is a super-easy recipe for the super-softest-squidgiest-srcummiest (told ya there'd be alliteration) chocolate chip cookies on the planet. It's a fail safe recipe for one of those 'I desperately need something sweet and home made' moments, but when you don't completely fancy baking and icing a cake. 
That's the beauty of cookies; once they're made they're ready to be eaten. 

So. Without further a do, how to make Chocolate Chip Cookies in Six Simple Steps. 
(Are you enjoying the alliteration?)

The all important ingredients. 
What you need: 

100g best quality (pref Green & Blacks) dark chocolate or a mixture of dark and milk depending on how sweet you can take it! 
125g unsalted butter, gently melted
100g caster sugar
75g soft brown sugar
1 organic, free range egg
vanilla extract to taste (I use half a teaspoon)
150g plain flour]
1/2 a teaspoon of baking powder (preferably magic)
An oven at 180 (fan assisted, 190 not fan assisted)

Step One: Mise en place, mise en place, mise en place! 
Heat the oven, weigh out all your ingredients, melt the butter, line your baking sheets. 

This is my Magic Baking Powder. It was a WONDERFUL gift from a friend - it has TRANSFORMED my baking! 
;
Step Two: 
Weigh the sugars together and mix them up, add the melted butter and mix with a wooden spoon. It looks like this - don't be alarmed! It gets more attractive soon...

Step Three: Add the vanilla essence and egg to the sticky, fluid sugar and butter mixture and beat together with your wooden spoon. The mixture becomes thicker and glossier.       
                       Step Four: sieve the flour and baking powder together into the mixture and then fold in quickly with a large silver spoon until just mixed. The mixture will still be slightly sloppy. 


Step Five: add the chocolate chips to the mixture and stir together. (In this batch I used a mixture of milk and dark choc.) Spoon tablespoon fulls of the mixture onto your lined baking trays and put in the oven. 

I do recommend that you aim to make each cookie the same size, as this helps with the cooking process. 

Bake for 8-10 mins, but check after 8 as they turn very quickly. They're done when your kitchen smells of cookies and there is a slightly crackled sugary finish to the golden mouthfuls of delish. 

Cookies going in the oven...

 Step Six: Take out of the oven and move on to a wire rack to cool as soon as you can! This cooling tray belonged to my Grandma and I LOVE the fact that it has squares and sometimes makes a pattern on the bottom of biscuits (more alliteration).


 EAT AND ENJOY. 


Fondest regards,
Whimsy x


Amusing anecdote:
I once baked these cookies for newly moved-in neighbours and went to take them round on a Sunday mid-morning. They thought I was really weird and I kept repeating my name over and over again in embarrasment but never managed to work out what their names were. So I suggest when you bake them, you keeo them and eat them all yourself!