Showing posts with label Dan Lepard. Show all posts

Thursday, 29 August 2013

Whimsy is Radical!

Dear Readers, 
It has often been said that Whimsy is Radical. 
Well, maybe it hasn't *often* been said, or possibly even said by anyone other than me, but in this post I intend to demonstrate the radicalisation of Whimsy! 
A coupe of weeks ago, I received an email from Luke at THE RADICAL TEA TOWEL COMPANY explaining that he would like to give me a RADICAL TEA TOWEL. Those regular readers amongst you will be aware that I am a big fan of tea towels, and that indeed Sally and Dave from TO DRY FOR have long been Friends of Whimsy. Anyway, I checked out their website and thought some of the RADICAL tea towels were mighty fine. These are my favourites: 
I'm not 100% sure how Emmeline  would feel about having her face on the washing up, but whatever spreads the message and all... (I got my form to write her name in capital letters in their exercise books on International Women's Day and quizzed them on her name every day for a week. I felt a bit bad at the variations in spelling, but at least they know Ms Pankhurst's name and what she did.) 
ANYWAY, I think THE RADICAL TEA TOWEL COMPANY are a great company and they have an excellent range of tea towels. I was THRILLED when I received my tea towel in the post, and I have to say it really got me thinking. Not only does it have a quotation from 'He wishes for the Cloths of Heaven' by Yeats (which has the doubly fantastic versatility of rendering it a classroom teaching aid), but it also made me sit up and question the carbon footprint implications of baking. 
I've been ruminating on this ever since and it's made me think about lots of issues arising from baking. I know that a vegan cake would have a lower carbon footprint, but then what about all the extra ingredients that make up for the dairy and what about the packaging? If you use hyper-local ingredients, a low cooking temperature, minimum dairy and make a cake that will last for a long time does that make it vaguely equivalent to a dairy free cake, or is it just as bad? Clearly, the imaginary vegan cake with all produce bought locally would be the best option, but this isn't a vegan baking blog, so I've tried to come up with something that has a low carbon footprint but still contains some (minimum) dairy products. Also, I suppose you could quite easily make this recipe vegan by replacing the butter with vegan margarine and the milk with almond milk and you could try leaving out the egg and see what happened. BUT if I'd have done that I would have had to buy almond milk and vegan margarine (both in their packaging) and surely the purchase of those products rather than the use of what I already had would have added to the carbon footprint of this particular baking adventure? 
As blueberries are in season at the moment, I thought I would make them my starting point. If you use berries that are in season and buy them from the Farmer's Market, then there is hardly any packaging and the produce has come directly from A to B so there is less carbon involved in the delivery of the product. This is our local London Farmers' Market in Whamps:
Goes without saying you should be walking to the Farmers' Market. Also, whilst there purchase organic eggs directly off the farmer along with some milk. Again, there is less packaging, less transport and therefore less carbon if you buy directly from the farmer. I found this article: 'Where's the impact of a home-baked Cake?' really interesting about the carbon intensivity of eggs when looking into all these issues. For the rest of the ingredients (150g plain flour, 125g fairtrade caster sugar, 2 teaspoons corn flour, 100g butter, half a teaspoon baking powder, one egg, 100g light brown sugar, 50g almonds, 50ml milk, 100g flaked almonds - recipe grace a Dan Lepard in the Guardian) I tried to use what I had in the cupboard to avoid more purchasing and therefore more carbon footprint creating, and I had recently purchased organic almonds from our local healthfood store, Peppercorns: 
hence the almond content in this recipe. I can't find any online data about the carbon footprint of almonds and whilst I would imagine it's quite high if you buy them from an independent shop at least there will be less delivery, packing and transport implications. Also, I already had them so it made sense to use them rather than waste them... 
Anyway, for the recipe: start off by making a blueberry jam - put the blueberries, 100ml water, two teaspoons cornflour and 50g caster sugar into a pan and gently heat until the mixture thickens, looks like goo and has split oozing blueberries in it.
 This could be used by itself as either a jam or a hot blueberry sauce to go with pancakes or drop scones - YUM. If you just made this then it would be a v low carbon footprint, but not a cake. So...
...next, make the base for the bars. Stir the ground almonds, flour, baking powder and remaining fair trade sugar together in a bowl and then rub in the butter. (Note the low quantity of butter in this recipe to keep the footprint minimal.)
Rub in til it resembles breadcrumbs - as there are almonds in the mix, this is a very rich, crumbly base. Beat the egg and sort of stir it into the mix to create the dough/pastry for the base. It's quite a wet base.
Pat it into your tin (I used a brownie tin - Dan Lepard says to use a 20x20 cake tin but mine worked fine.)
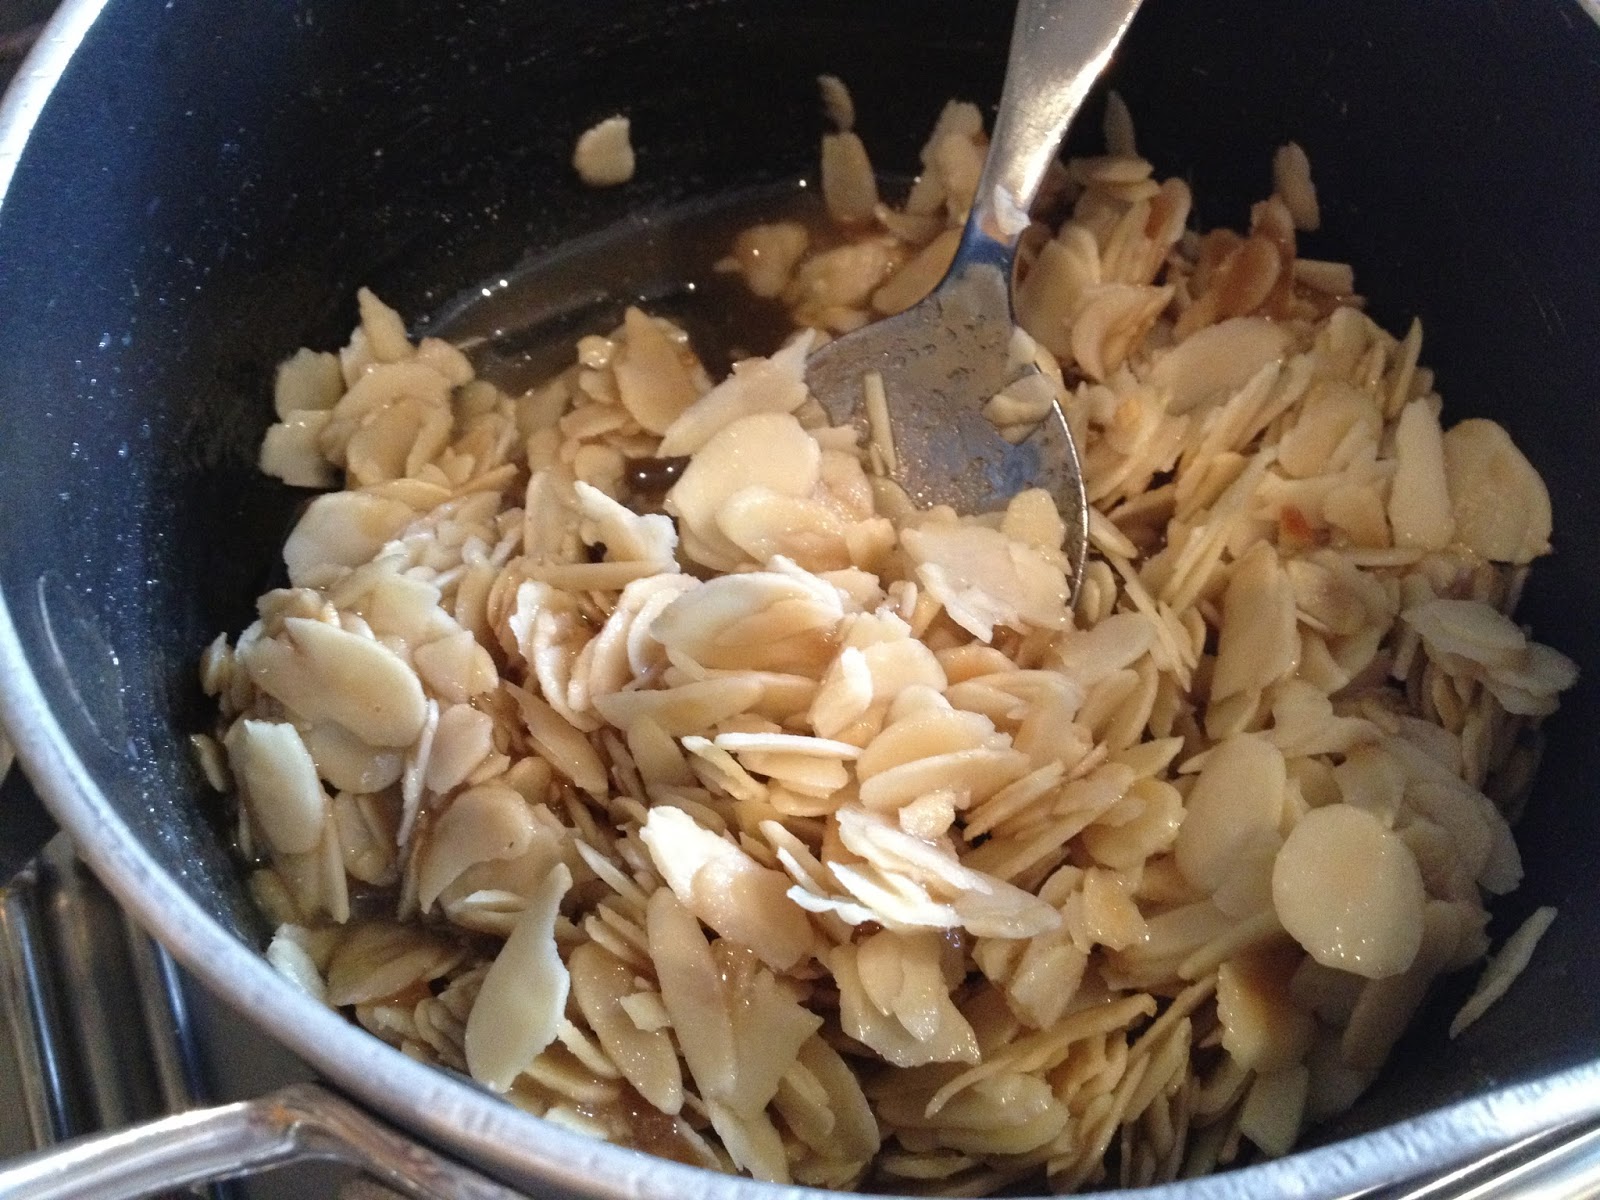
The third layer - the topping - is made by simmering the milk, honey, brown sugar and almonds together in a pan.
 It takes merely seconds to heat it through until it is a sticky, slightly thick topping that looks like this:
Then the fun part comes with assembling the layers! Put the blueberry jam/compote on top of the base and the sticky almonds on top of the jam.
Et voila! Bake in the oven for 35 mins (relatively short baking time) at 160 degrees (relatively low oven temp), take out and leave to cool completely before cutting up. The almonds should be golden and the jam will be bubbling up slightly over the edges if it's ready.
Then for the fun part: STYLING YOUR BAKE THROUGH THE MEDIUM OF MINI-FLAGS! Long time Readers will know of my love for the mini-flag. Imagine the fun I had making these sloganistic ones:
FYI there isn't a spelling mistake in the above flag, it's supposed to be the anarchy sign on the A which, admittedly, is an extremely teenage thing to have done but there we go. (I had to explain this to my brother in law who thought I'd tried to cover up a spelling mistake, so I'm explaining it to you, Dear Reader, in case you too are labouring under this misapprehension. Incidentally, b to the l also informed me as I was doing this RADICAL BAKING photo shoot late last night that the truly lowest carbon footprint cake may well be PETITS FOURS as they were baked in the residual heat of 18th century cooling ovens. Although the carbon footprint implication of time travel is probably quite high.)
 Whimsy DOES love Radical Tea Towels, Dear Reader. Do you?
 My question to you: DOES this constitute as a 'low carbon cake'? Answers on a post card please...
And thus it ends. Many thank to Luke from THE RADICAL TEA TOWEL COMPANY  without whom this particular blog post would have never come about. It really has made me think. And I'm not sure what to do about the whole thing. But I do suggest you check out this blog: Charlie Bit My Tofu for interesting and lively ruminations on vegan food.
Love from Radical Whimsy! x

Saturday, 10 August 2013

Brazil Nut Espresso Cake

Dear Readers, 
I had promised you a complex Saturday Brazil nut extravaganza grace a Dan Lepard, however, I changed my mind! I *am* still delivering a coffee cake with brazil nuts, but I have decided to forego the Lepard inclusion of wholemeal flour and actual ground roasted coffee beans and have created my own version. This is a Brazil Nut Espresso Cake that can be made in an express Saturday fashion! 
 Follow the basic ingredients for a Victoria Sponge - ie weigh three (or four if you're after a super-huge cake) eggs in their shells and use that measurement to weigh out the same weight of butter, caster sugar and self raising flour. Then make an espresso and have your roughly chopped brazil nuts and vanilla extract at the ready! (I held four brazil nuts back for decoration and used 75g of nuts in total!)
Beat the butter til its pale, then add the sugar and cream together. Crack in the eggs one by one and beat in thoroughly (add a tablespoon of self raising flour if the mix looks as if it's going to curdle).
Make your espresso and beat it in along with a teaspoon or so of vanilla. Then fold in your self raising flour with a large silver spoon, followed by the roughly chopped brazil nuts, and put into two greased and lined Victoria Sponge tins. Bake in the oven at 170 fan assisted for about thirty minutes - top should be golden and springy when it's ready and the cake should be moving away from the sides of the tin. Or insert a skewer and it should come out with a few crumbs stuck to it if the cake's ready. Leave to cool on a wire rack.
Meanwhile, make the coffee flavoured buttercream icing! I swear by the ratio of 100g butter to 300g golden icing sugar, about one tablespoon or so of espresso and a dash of vanilla. Beat the butter in a bowl then add the icing sugar, begin to beat in (reserving a little icing sugar in the bowl) before adding the espresso and vanilla. The liquid makes it much easier to beat together, but keep testing as you beat more icing sugar in as you should make the icing to your own taste.
When the cakes are cool, use about half the buttercream to sandwich them together and the other half to ice the top of the cake. ICING TIP: I always start by dolloping small amounts of icing around the circumference of the 'base cake' so that you have the illusion of extremely thick icing and then use a spatula to spread it across the rest of the cake base. When icing the 'top cake', follow the same idea but in reverse ie work from the inside of the cake outwards. Does that make any sense??
Et voila! A Brazil Nut Espresso Cake in express time! To decorate, I shaved the held-back brazil nuts and scattered them around the edge along with some shaved dark chocolate to give the look of the crema on top of an espresso!

One more day to go!!
Silver Whimsy x

Friday, 9 August 2013

Day three of five... Adventures in Chocolate!

Dear Readers, 
How are you bearing up during The Marathon of Whimsy? Silver Whimsy herself is becoming slightly fatigued by all this baking, but is nonetheless ENJOYING the CHALLENGE! (Never a good sign when one talks of oneself in the third person is it?)

So today, the Whimsy Kitchens bring you what has been described by our Number One Baking Guru Dan Lepard as "simply the best chocolate muffin you'll ever eat". And, by George, I tell thee this needs be true because this is quite probably the most complex chocolate muffin you will ever make as well. I started baking at 11 am and I have only just finished, so from mise-en-place prep through to baking to icing to Whimsy photoshoot, these chocolate muffins have taken THREE HOURS to make. That is a long time in my book! 
First things first, here are the ingredients: 

50g cornflour
3 tablespoons cocoa
100g dark soft brown sugar
225 ml cold water 
75g unsalted butter (cubed) 
125g dark choc broken up into small pieces
75ml sunflower oil
2 teaspoons vanilla extract
2 large free range eggs
125g caster sugar
125g plain flour
2 1/2 teaspoons baking powder

So, these are entitled 'Chocolate custard muffins' and come from Dan Lepard's 'Short and Sweet' book. The name instantly put me off as did the complexity of the recipe. It has;t really been noted here but I have NO luck when it comes to baking with chocolate. It always seems to go wrong. SIBF suggests it's just that my palate doesn't really work around chocolate in baking and I think that's true, but I also think I just suck at baking with chocolate. I was hoping Dan's recipe would break that trend! 
The first step was super-exciting because it felt like SCIENCE! Place the cornflour, cocoa, brown sugar and water into a saucepan. Whisk under a medium heat constantly and watch the magic happen!!! As it reaches boiling point (don't be put off - it will take a few minutes), your mixture will begin to turn incredibly thick, smooth and shiny as pictured above. It is v exciting! When this happens, remove from the heat and...
...beat in the butter and chocolate until melted and absorbed (doesn't take very long at all). 
Then, beat in the oil, vanilla and one of the eggs until it's combined before...
...beating in the caster sugar and remaining egg until the mixture is smooth, glossy and thick. It will probably look a bit like this: 
Sift the flour and baking powder together into the pan and marvel as your hand too turns preternaturally enormous as mine in the picture below. (Sorry, I just had to include this image as I CANNOT BELIEVE how long my fingers look. I am also EXTREMELY AMUSED by the shape of my little finger.)
 Scoop out into your muffin tray. TOP TIP: I wasn't sure how deep I could fill them and ended up with some mixture left over but having made them I can now confirm that you can fill your cases to the top as they don't rise *that* much and mine could have definitely taken more mix.
 Bake in the oven at 160 fan assisted for twenty five minutes. They do give you a sense of pride when they come out of the oven because they promise so much! Especially for a baker renowned (by her SIBF) for chocolate baking disasters.
 I'm not even going to BEGIN explaining how I made the extremely extra-chocolatey-get-me-some-more-chocolate-oh-no-that-is-way-too-much-chocolate-help-I-have-now-o'd'd-on-green-and-blacks chocolate icing, but if you would like the recipe, feel free to email me or leave a message on the blog.
 I suggest serving in the garden with a cocktail umbrella. And possibly a cocktail.
 Anyone want a chocolate muffin? Seriously I have SO MUCH CAKE IN THE HOUSE HELP! COME AND EAT SOME!!
Until the next time, which I calculate to be tomorrow,
Silver Whimsy x


Wednesday, 7 August 2013

Parallel Lines

Dear Readers,

I am amazed / awed / thrilled to discover that I do not blog and yet still you read! Many thanks for that. I am going to try and set myself a five day project, today being day one. It will be a somewhat costly project but one I will attempt to adhere to nonetheless. I intend to bake once a day for the next five days. That means Wednesday, Thursday, Friday, Saturday and Sunday. (Those of you who grew up in the 80s might note the similarity that sentence holds to Sinitta's 'Toy Boy' - except that whilst aforementioned pop starlet was going out on dates every night, I will be getting flustered in the kitchen  with the baking powder and wooden spoons.) Anyway, that is my intention but, as I so frequently tell my students, 'the best laid schemes of mice and men gang aft agley' so we'll see how it all turns out...

But enough of this chattering! Today I have been experimenting with Dan Lepard's 'Short and Sweet' recipe book. I am not much of a banana eater unless the fruit features in a cake, but when faced with some over-ripe bananas today I didn't want to resort to the usual fail-safe banana and chocolate cake and so looked to Dan Lepard for the answer. And, Dear Reader, indeed he held that answer!
Dan Lepard's recipe says that "if Carmen Miranda ever wondered what to do when her bananas ripened, she should have got some of her personal stash of baking powder out ( I hear she'd hide it in the heel of her shoes) and made these." Well, I'm not beginning to compare myself to Carmen Miranda (although I have been known to wonder around with a fruit hat) but I was wondering what to do with my over-ripened bananas and I do have a very lovely pot of baking powder so I thought I was all set to make these little wonders.

The recipe is slightly more complicated than I initially thought because to begin with you have to make BRAZIL NUT TOFFEE! Yes! Actual home-made toffee with brazil nuts. In all my baking adventures I have never experimented with HOT SUGAR until today and it was mighty exciting.

Put 75 g caster sugar in a pan with two tablespoons of cold water and heat it to the boil!
(I took photos of the process so that if, like me, you too are a novice at sugar-boiling hopefully you won't get too scared.)
Dan Lepard says to wait til it turns a 'reddish-golden caramel' and then take it off the boil. I sort of had to guess what the colour was but I guessed that it meant this colour:
and the smell coming from the pan seemed to confirm my belief. Have 75g of roughly chopped brazil nuts ready and stir them into the toffee immediately.
TIP: Work very quickly!! The toffee sets faster than you can imagine and I soon realised I needed to up my speed if I was going to get the toffee out of the pan and onto the pre-prepared baking tray with a sheet of baking parchment. Spread the mixture out and wait for it to go cold. When it's cold, cut it up into small bits and try to resist the temptation to eat it all like sweets and try to save it for your actual tray-bake.
I have to say the BRAZIL NUT TOFFEE was a BIG hit with my SIBF who enjoyed it very much.Thinking about it, if you were super-organised you could have this made in advance and stored in your cupboard for a rainy day.

Next, make the blondies! This is the easy bit. Heat the oven to 190/170 fan and line your brownie tray with foil. Melt 100g unsalted butter with 200g white chocolate over a low heat.
Add it to a bowl and beat in 225g sugar, two teaspoons vanilla extract, 2 ripe bananas peeled and chopped, and one free range egg.
Then sift 225g plain flour with a quarter teaspoon of baking powder into the bowl and fold it in along with the (remaining) BRAZIL NUT TOFFEE.
Scrape the mixture into your brownie tin and bake in the pre-heated oven for 35minutes.
I baked it on the middle shelf and thirty-five minutes was spot on for my fan assisted oven.
Unfortunately, you have to hold off eating them straightaway as Dan Lepard said they needed to be stone cold before cutting...but I would be lying if I told you I managed to wait until they were stone cold...they were just too tempting.
The brazil nut toffee provides a wonderful contrast to the squidy smooth white chocolate cake and the whole blondie is infused with the taste and scent of bananas. In a better way than that sounds. To sum up in the words of the SIBF: "I have to step away from the blondie!"
Best served next to the record player with a healthy dose of 'Parallel Lines'. (Beats Sinitta any day of the week.)

Love and other demons,
Silver Whimsy x

PS You can find Dan Lepard's original recipe here: Banana Blondies